Connect to Google tools
Last updated:
UW Theme 2.0 has options for connecting your site to Google Analytics, Google Tag Manager, Google Search Console, and Google Programmable Search Engine to track traffic and improve search results. This page provides guidance on how to set them up in the theme.
Before you begin
Before you connect Google tools, review these important considerations to ensure your setup is supported, secure, and compliant with campus policies.
Wait until your site is live to connect Google tools
Do not connect Google Analytics, Search Console, or Tag Manager until your site is live on its final public URL (for example, buckybadger.wisc.edu). Setting them up too early can create confusing data and extra setup changes later.
What’s not supported
UW Theme 2.0 provides fields to connect your site to Google tools, but the UW Theme Team and WiscWeb cannot offer support for using these tools. For more help, visit Google documentation.
Google Analytics Practitioners Group
Join the Google Analytics Practitioners Group on Microsoft Teams to connect with others, share tips, and get help with Google Analytics 4.
HIPAA compliance
Some campus groups are part of UW–Madison’s Health Care Component (HCC) because they handle protected health information (PHI) under HIPAA. If your site is part of the HCC, do not add Google tools to your site without approval from your unit HIPAA Privacy or Security Coordinator.
Global Analytics tracking
Global Analytics is enabled by default in UW Theme to help improve university-wide insights. You can disable it within the Google tab in your Theme Settings.
Account creation tips
Use a departmental service account for Google tools whenever possible for security and for maintaining shared access with your team members. This protects your team from access issues during staff turnover or when student employees leave. Learn how to create a service account.
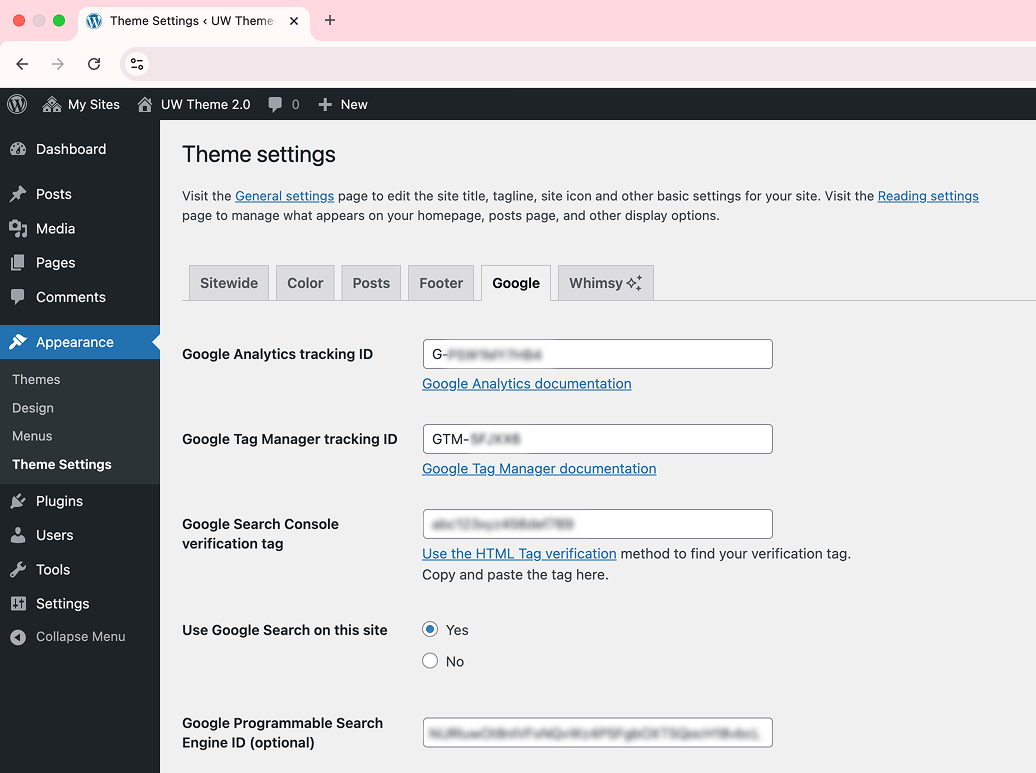
Connect to Google tools
To connect your site, go to Appearance > Theme Settings > Google tab in your WordPress dashboard and enter the IDs provided by each Google tool. These IDs link your Google accounts to your UW Theme 2.0 site.
Add Google Analytics Tracking ID
If you’re using Google Tag Manager to add Google Analytics (GA), skip to the Google Tag Manager section. We recommend adding GA using Google Tag Manager if you use more tracking platforms beyond GA, such as Google Ads or Meta Pixel.
Add Google Analytics by using the following steps:
- Log into Google Analytics.
- Create an Analytics account if you do not have one.
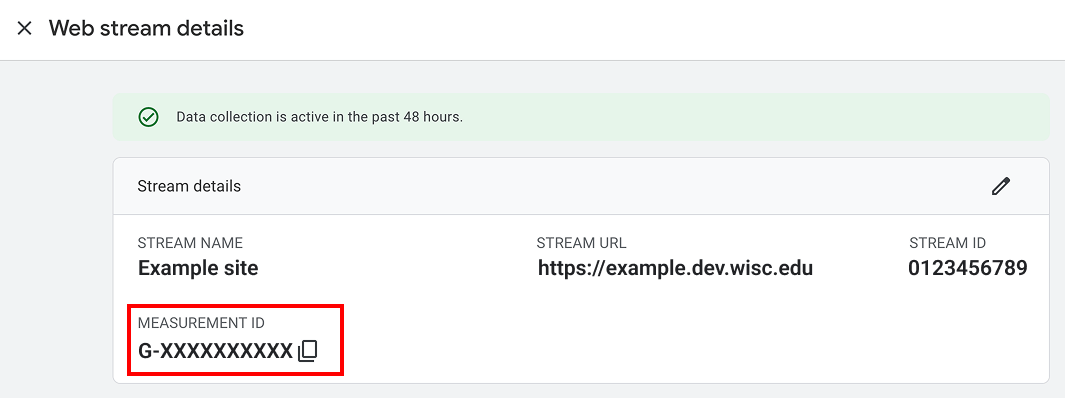
- Find and copy your Google Tag ID.
- Paste the Google tag ID in the Google Analytics Tracking ID field in Theme Settings.
- Logged-in users won’t appear in the report. Log out or ask someone else to visit the site to test.
- Check the Realtime report in GA to confirm traffic.
- No data after 24 hours? Visit Google’s troubleshooting guide.
Learn more about Google Analytics.
Add Google Tag Manager Tracking ID
Google Tag Manager (GTM) allows you to centrally manage all marketing and analytics tags, like Google Analytics, Facebook Meta Pixel, and Google Ads, in one place.
Add Google Tag Manager by using the following steps:
- Log into Google Tag Manager
- Create a Tag Manager account if you do not have one one and choose “Web” as the target platform.
- Find and copy your container ID located in the Workspace tab.
- Paste the container ID into the Google Tag Manager tracking ID field in Theme Settings.
- You can now add desired tags to track data and clicks on your pages.
- Preview to test the connection. GTM scripts aren’t added for logged-in WordPress users, so log out if your tag data isn’t showing
- Publish your GTM container when ready to track live data.
To set up Google Analytics with GTM, follow Google’s documentation.
Learn more about Google Tag Manager.

Add Google Search Console ID
Google Search Console helps you monitor, maintain, and troubleshoot your site’s presence in Google Search results. You can also submit a sitemap to Search Console to help Google discover and crawl your site.
Add Google Search Console by using the following steps:
- Log into Google Search Console.
- Follow Google’s instructions to add a new URL-prefix property. Do not select the Domain property.
- Choose the HTML tag verification method from the pop-up to verify site ownership.
- Google will give you a line of code.
- Only copy the long string of letters and numbers inside the quotations marks after “content=”
- Paste that string into the Google Search Console verification tag field in Theme Settings.
- If your site is hosted on WiscWeb, it may take up to 5 minutes for the cache to clear. If you see errors, wait a few minutes and try again.
Your Google Search Console ID is located in between the “content=” HTML property. It’s a long string of numbers and letters that is 43 characters long.
<meta name="google-site-verification" content="................." />Submit a sitemap (optional)
After verifying your site in Google Search Console, you can submit a sitemap. WordPress automatically generates a sitemap for your site.
Your sitemap URL is: https://your-site.edu/wp-sitemap.xml
To submit your sitemap:
- Open Google Search Console and select your site.
- Go to Sitemaps.
- Enter the sitemap URL and submit.
After you submit the sitemap, Google will begin processing it. Indexing and updates may take time to appear.
Search Console resources
Add Google Programmable Search Engine ID
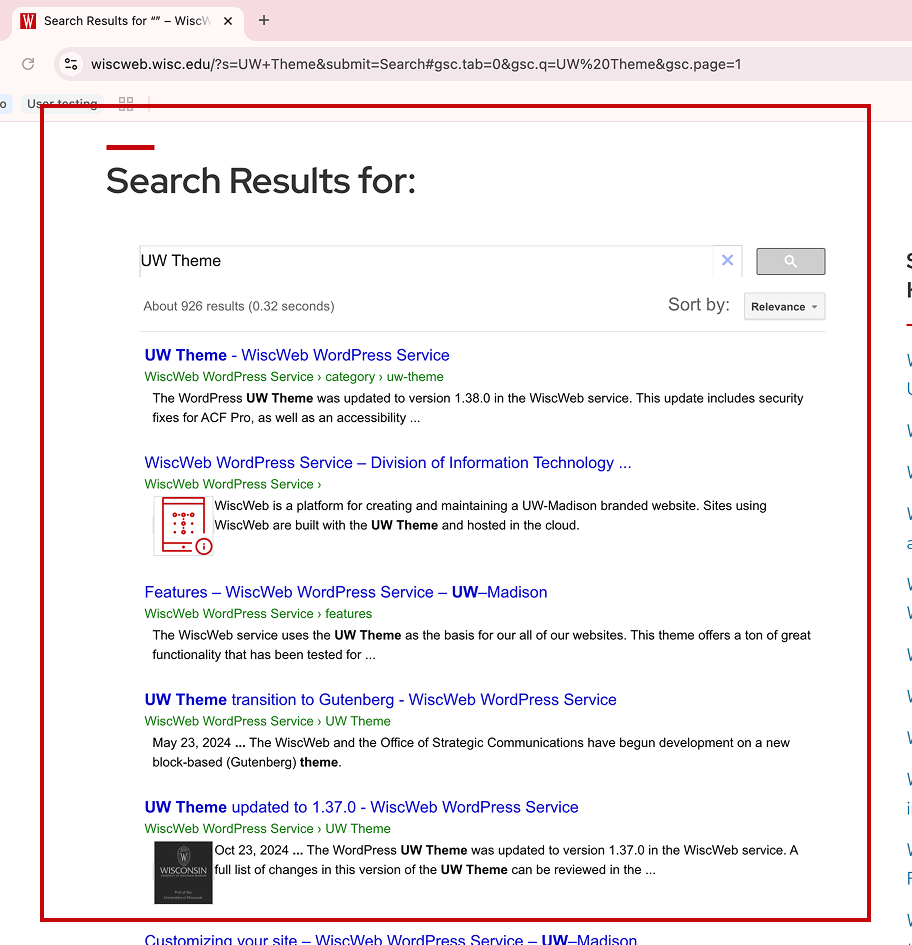
Google Programmable Search Engine offers a more powerful search experience than the default WordPress search. It supports features like autocomplete, custom result categories, analytics integration, and more control over how search results appear. It can also index additional content, such as images and custom post types, including staff member pages.
Before you start: Create an ad-free account through UW
Create or configure an ad-free Programmable Search Engine before adding it to your site. Otherwise, ads may appear in your site search results.
Follow the steps below to add Programmable Search Engine to your site:
- Make sure search is enabled in the Sitewide tab in Theme Settings.
- Find and copy your Programmable Search Engine ID
- Paste the ID into the Google Programmable Search Engine ID field in Theme Settings
- Search your site to see results from Programmable Search Engine.
Learn more about Programmable Search Engine.
Additional resources
For detailed instructions and troubleshooting, use Google’s official documentation and training materials. These resources offer the most up-to-date guidance for using and managing each tool.
Training
- Google Data Analytics Professional Certificate
- Analytics Academy
- Google Skillshop
- Search Console training video series