Intro to the Block Editor
Last updated:
UW Theme 2.0 uses the WordPress Block Editor, also called Gutenberg, WordPress Editor, or Gutenberg editor, and is the new way of publishing content in WordPress. This guide provides a brief overview of the editor as you get started with the theme.
Visit the WordPress Block Editor guide for demos and videos of the editor.
Block Editor workspace
The WordPress block editor is made up of a few key areas that open and close as you work, as shown below. It’s normal for the interface to change as you select blocks, open tools, or adjust settings. This is how the editor is designed to work.
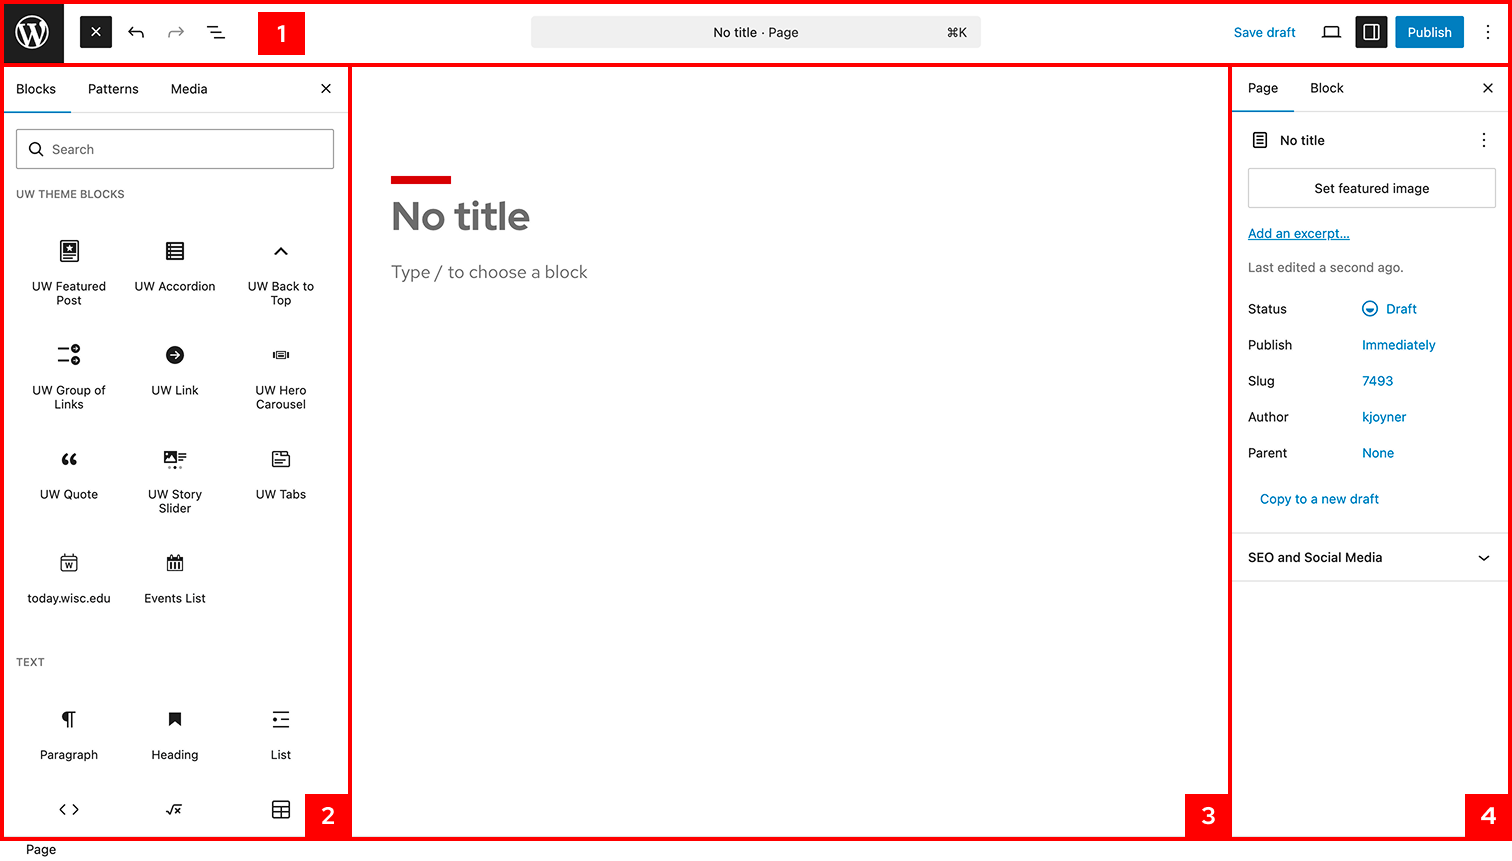
The elements highlighted are:
- Top toolbar: Global tools for adding content, opening panels, previewing, and publishing
- Block Inserter: Browse and add blocks, patterns, and media
- Editor canvas: Where you write, edit, and arrange page content
- Settings sidebar: Page-level and block-level settings that change based on what’s selected
Top toolbar
The top toolbar contains global actions you’ll use while building and publishing pages. When you open a new page, the top toolbar will look like the image below. This list is meant to help you recognize what’s available as you explore the editor.

The elements highlighted are:
- View posts / pages: Return to the list of posts or pages.
- Block Inserter (plus icon): Add blocks, patterns, and media to the page.
- Undo/redo: Reverse or reapply recent changes.
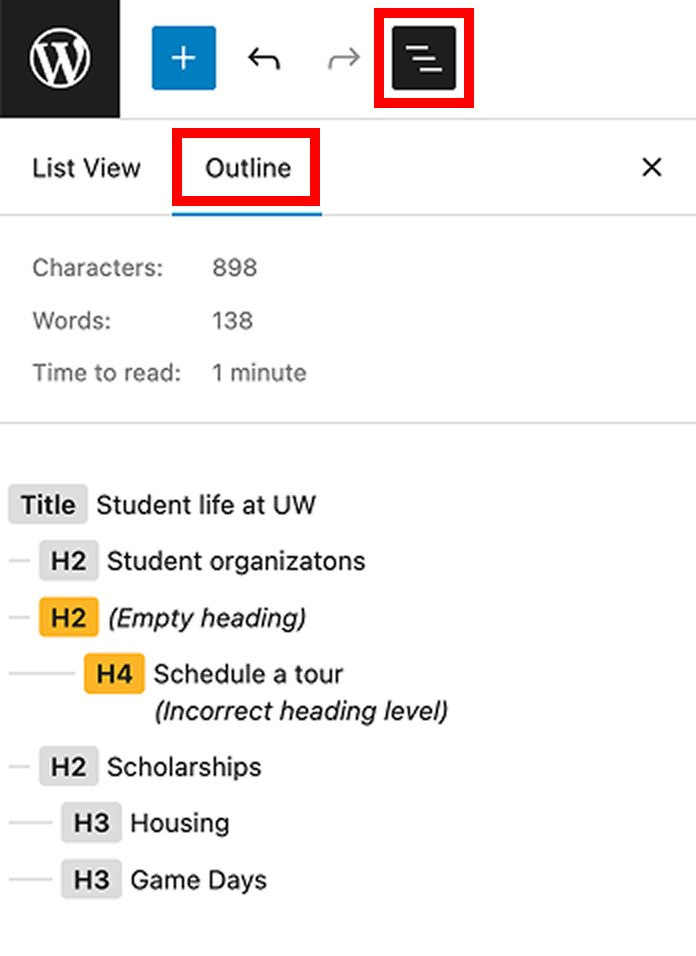
- Document Overview: Open List View to see all blocks on the page, or Outline to review heading structure.
- Command Palette: Search for editor actions and settings using the keyboard. Learn more about the Command Palette.
- Save draft: Save draft changes if the page is unpublished.
- View page: Preview how the page will appear on different screen sizes.
- Settings sidebar: Open the post/page sidebar settings and the block settings.
- Publish/Save: Make your page live or update an already published page with changes.
- More options (three-dot menu): Access additional editor options and preferences.
For detailed explanations of these editor tools and controls, visit the official WordPress block editor documentation.
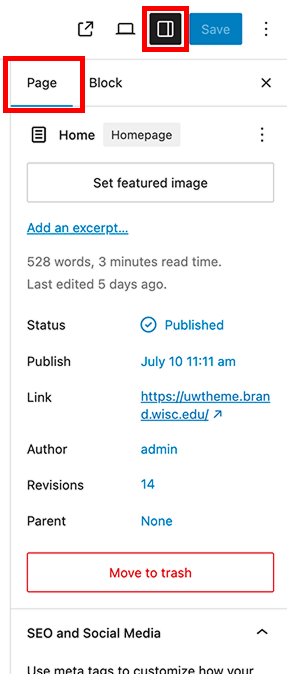
Settings sidebar
The Settings sidebar displays a panel on the right that shows page/post-level settings or block-level settings depending on what is selected. Open the Settings sidebar from the top toolbar.
For a full overview of page and post settings, see the WordPress documentation on the Page/Post Settings sidebar.
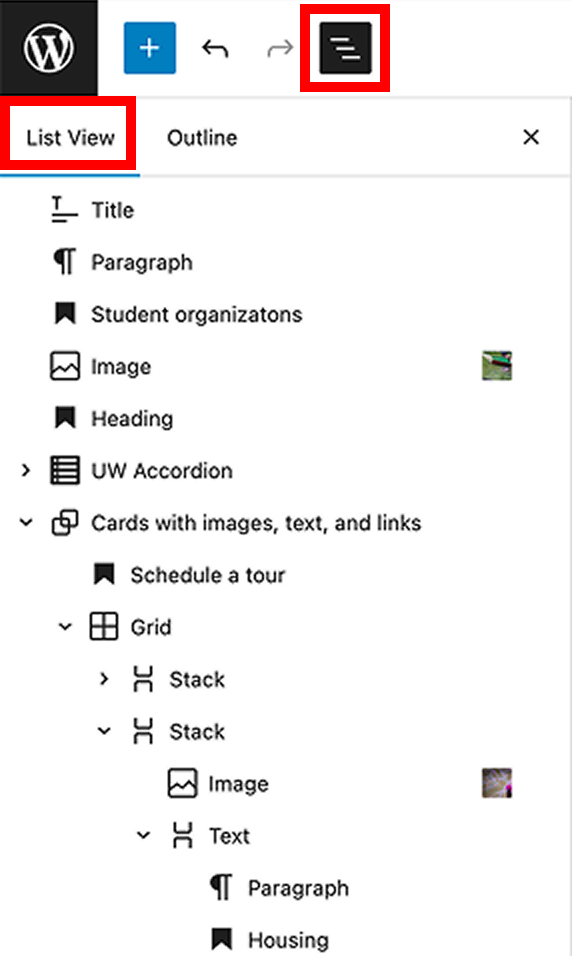
Document Overview / List View
The Document Overview allows you to access List View and Outline sections.
List View helps you see all blocks on the page and reorder or manage them. You can group, duplicate, delete, or add blocks before or after a selection using More options (three-dot menu).
The Outline section allows you to review your page and confirm that heading levels follow a logical structure. Using headings in order (H1 > H2 > H3, and so on) makes content easier to read and helps assistive technologies interpret the page structure.
Tip: Keep List view open by default
You can set List View to open by default. Open More options (three-dot menu) in the top toolbar, select Preferences, then enable Always open List View under General settings.