UW People Plugin
Last updated:
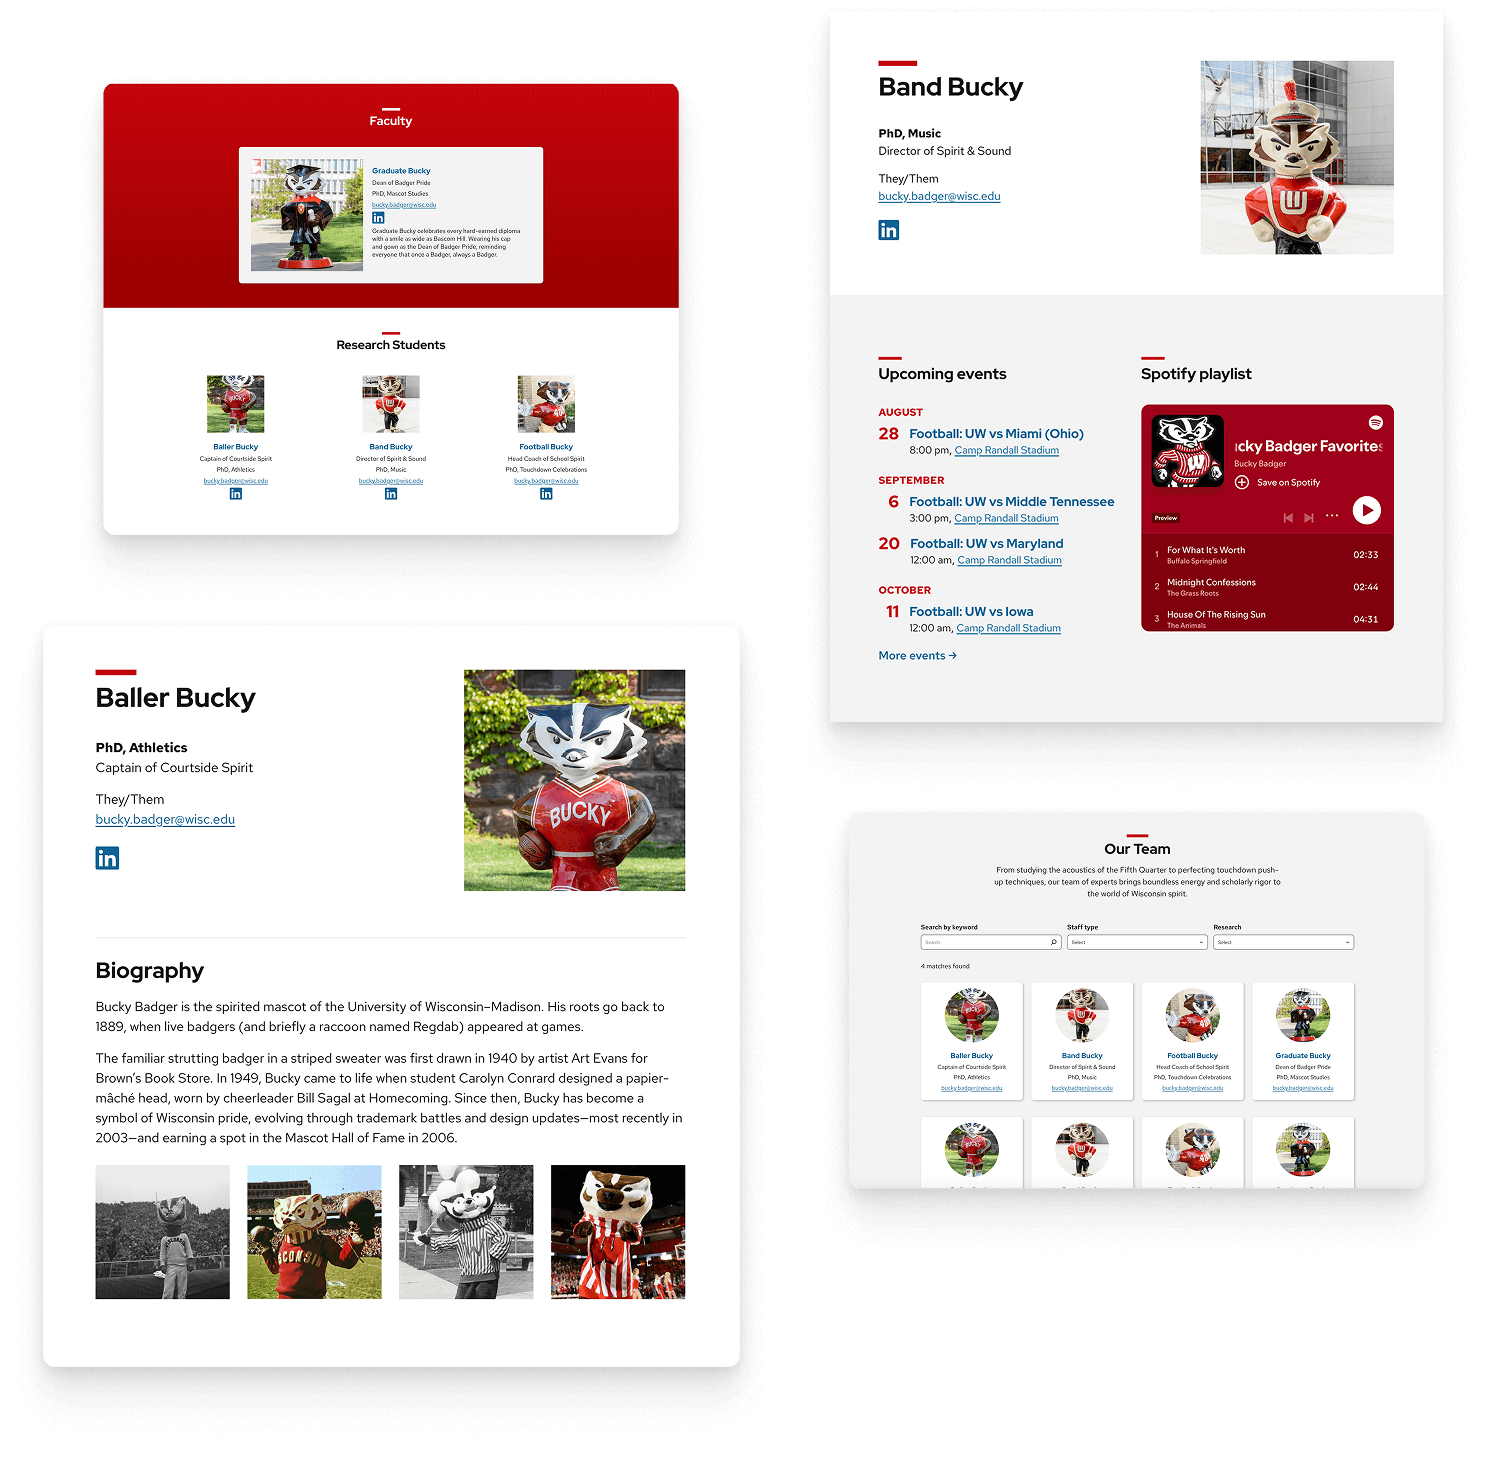
Create profile pages for faculty, staff, or team members. Display them anywhere with the UW People Listing block.
On this page
About the plugin
Create profile pages
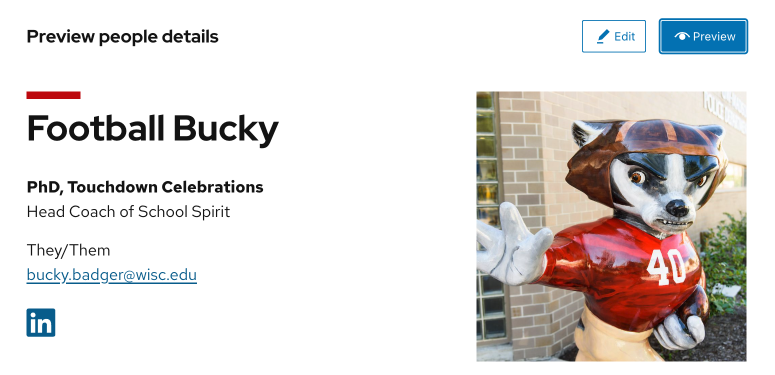
Create individual pages for each person with fields for names, titles, photos, and contact info. A flexible bio area lets you drop in blocks for longer text, links, or media – so every profile stays consistent but can be customized as needed.
Organize content with tags
Use tags to group people by type (e.g., Faculty, Staff, Student) or research area (e.g., Biochemistry, Theater, English). Tags power the search and filter options in the UW People Listing block.
Display with the UW People Listing block
Place the People Listing block on any page to create directories, team grids, or staff lists. Choose a layout and add an optional search bar and filters for easy browsing.
How to use
Enable the plugin
Go to the WordPress Admin > Plugins > Find UW People and click Activate.
Create a new person page
There are two different ways to add a new person page.
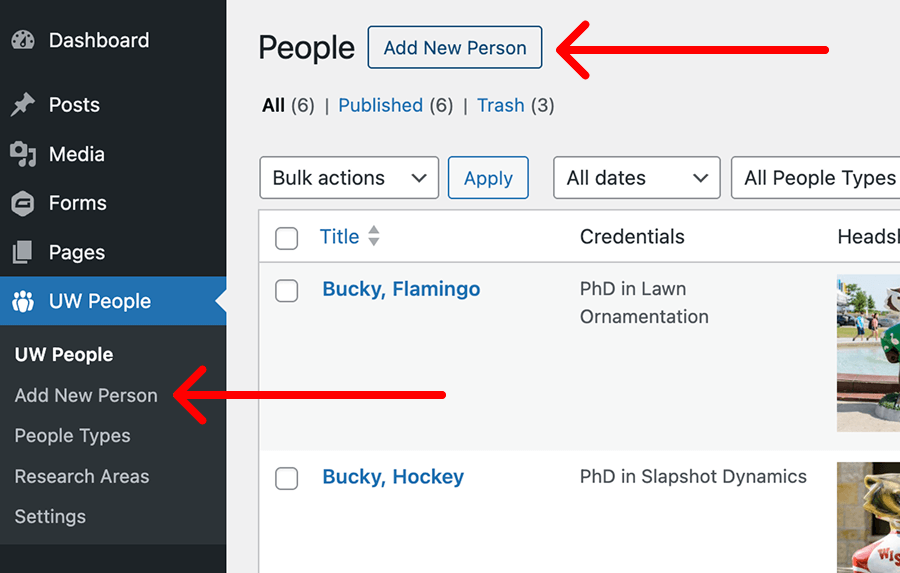
- Go to WordPress Admin > UW People > Click on the Add New Person button in the top left.
- Go to the WordPress Admin > UW People > Click on Add New Person.
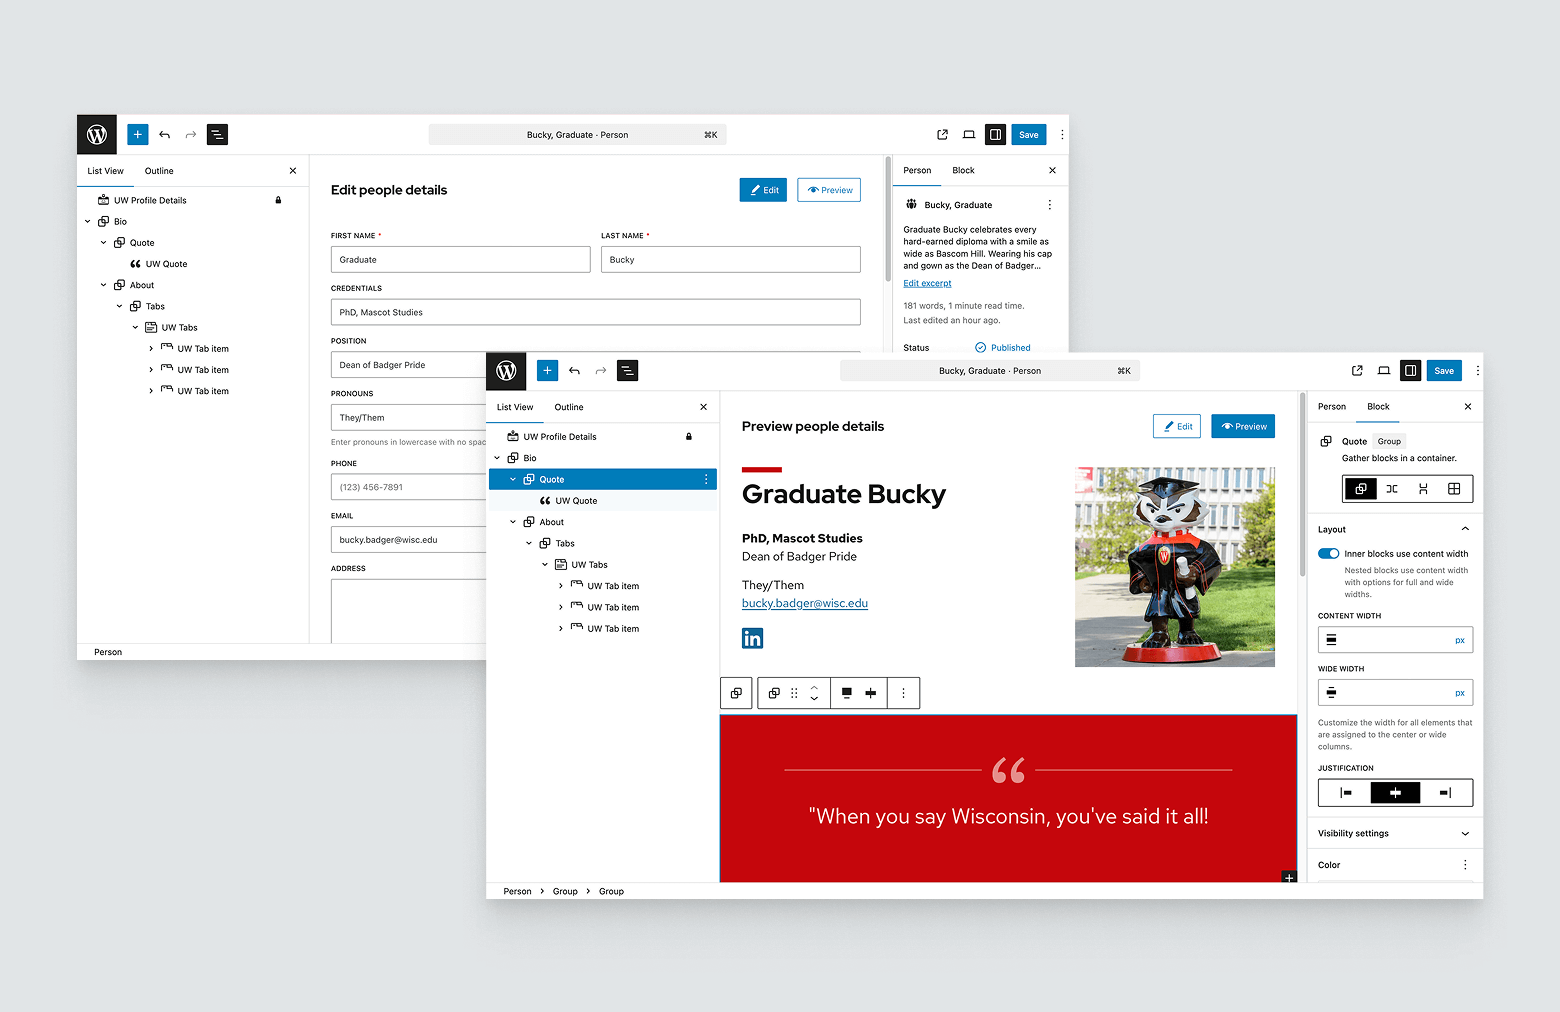
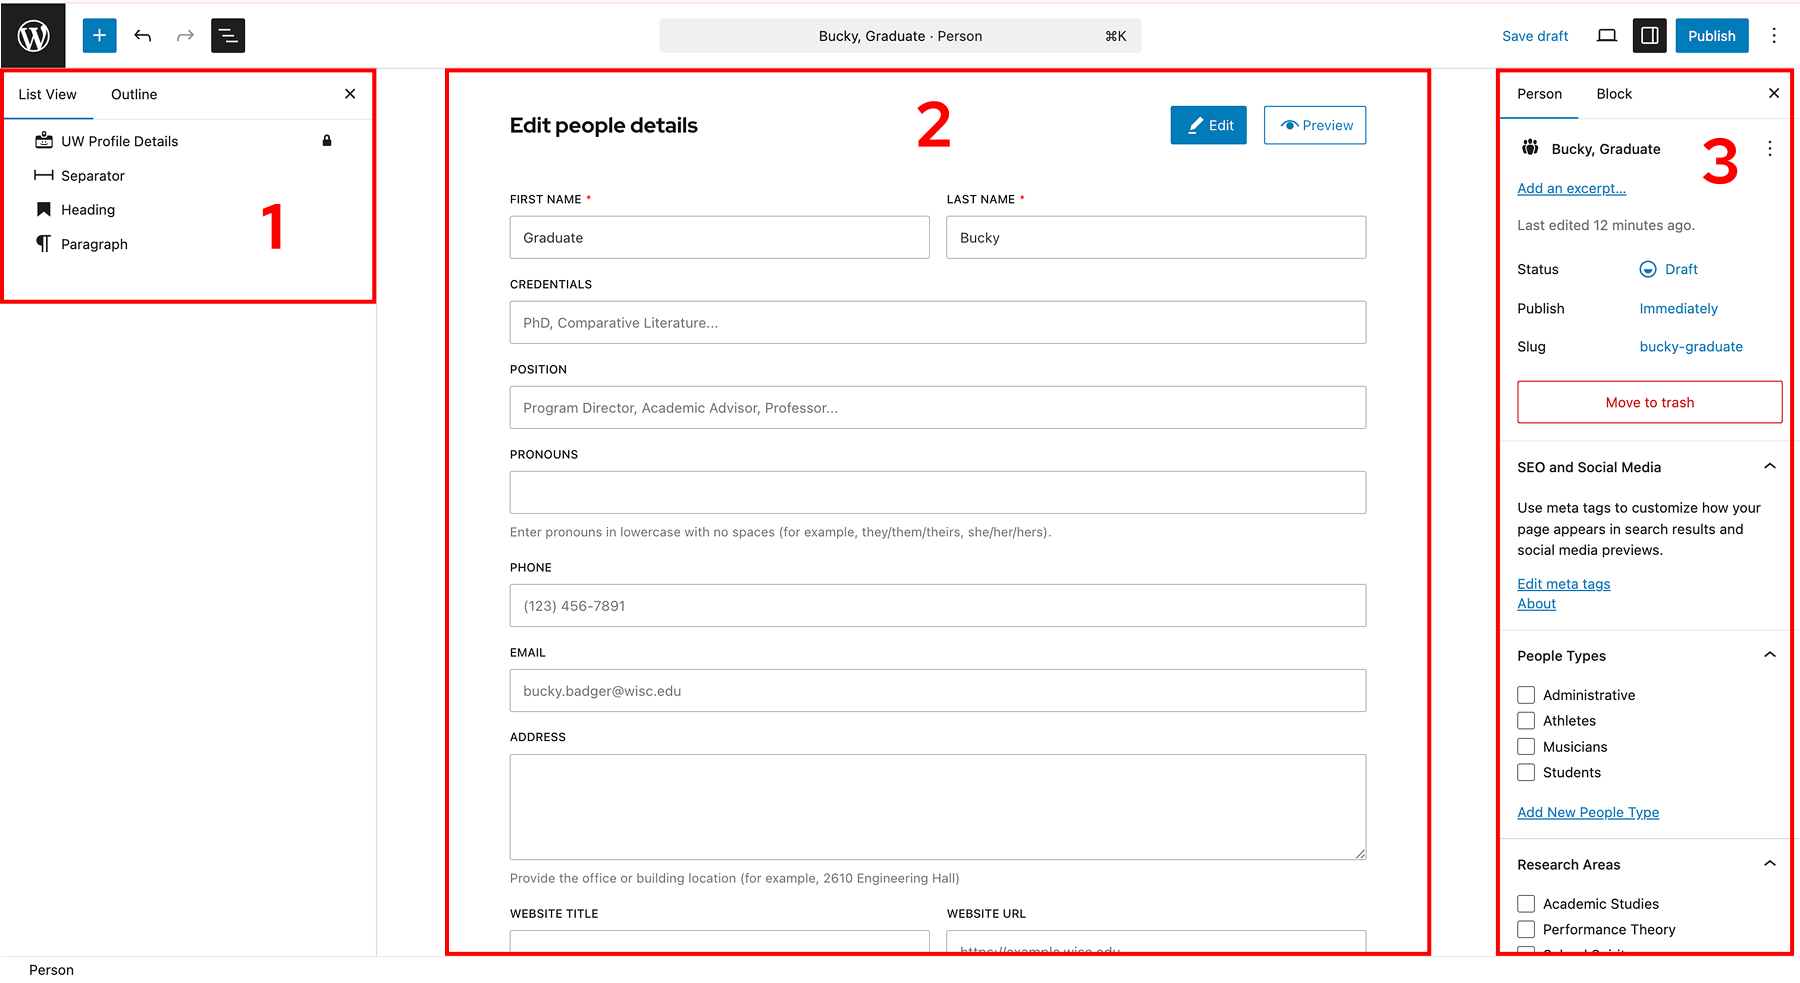
You will be presented with the Edit people details screen to add information about your person. The editing screen is divided into three main areas (see image below):
- List View (left column): Shows all blocks in the page
- Main editor area: Where you enter details and add content
- Page settings sidebar (right column): Where you manage page settings, SEO/social information, and tags
List View (left column)
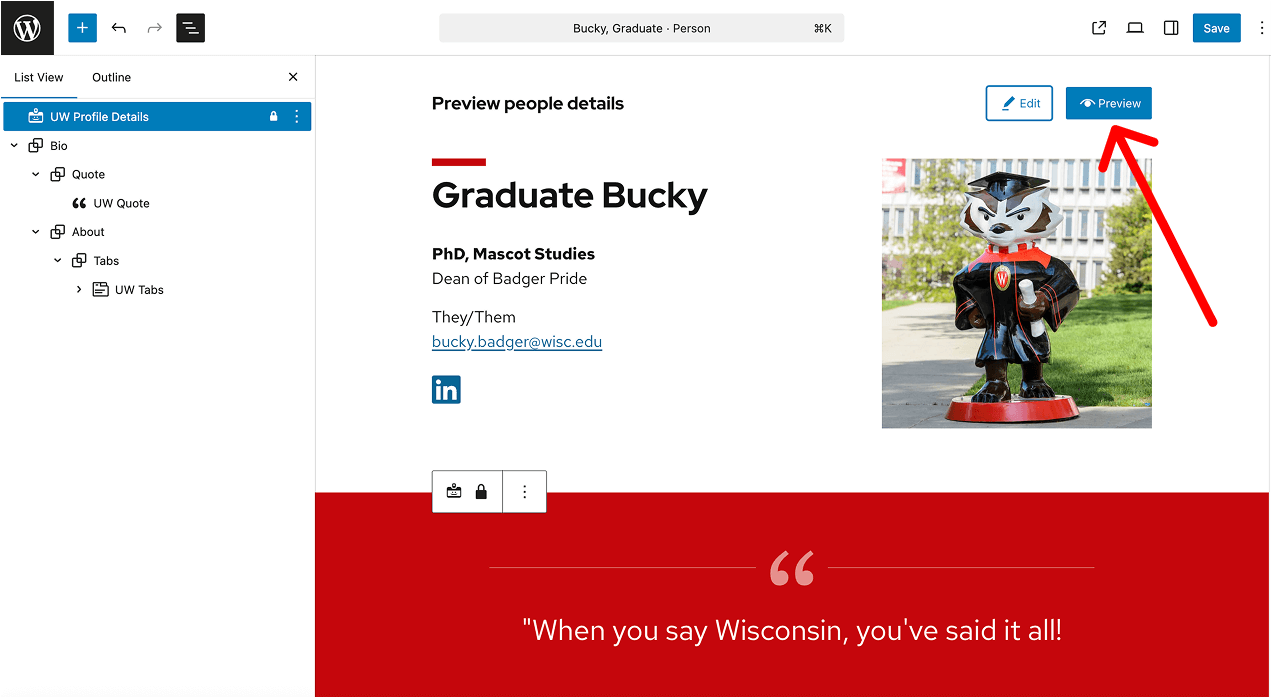
Open the List View to see all blocks on the page.
Do not remove the UW Profile Details block (lock icon). It stores structured data that powers the UW People Listing block. If deleted, the fields are lost and the page must be recreated.
Main editor area
- Enter the person’s details: name, title, email, photo, pronouns, etc.
- Add a bio or extra content below the input fields using blocks (headings, text, links, images).
- To hide this extra content, remove those blocks in List View.
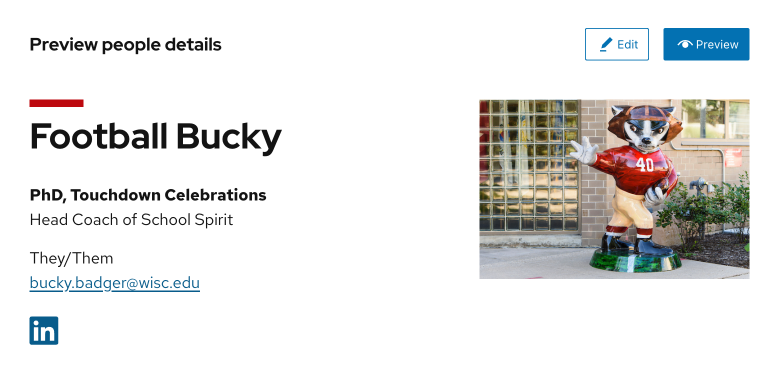
- Click Preview to see how the page will look before publishing.
⚠️ Use profile fields only for their intended purpose
Profile fields are mapped to structured data that helps search engines and Language Learning models (ChatGPT, Gemini, etc) understand the content on the page. When a field is used for unrelated information, that meaning is lost.
For example, if the Address field contains achievements, those achievements may be treated as an address in search results or AI-generated summaries. This can cause confusion and incorrect representations of your content.
Page settings sidebar (right column)
- Add an excerpt (200 characters or less recommended) to show in people listing layouts.
- Assign tags for People Types or Research Areas; these power search and filter options in people listing layouts.
- Enter SEO and Social Media details to control how the profile looks when shared.
People images
To get a square crop, use an image that’s at least 800px on one side—or exactly square and larger than 800px. Smaller images won’t crop; they’ll display at their original size and shape.
Organize people with tags
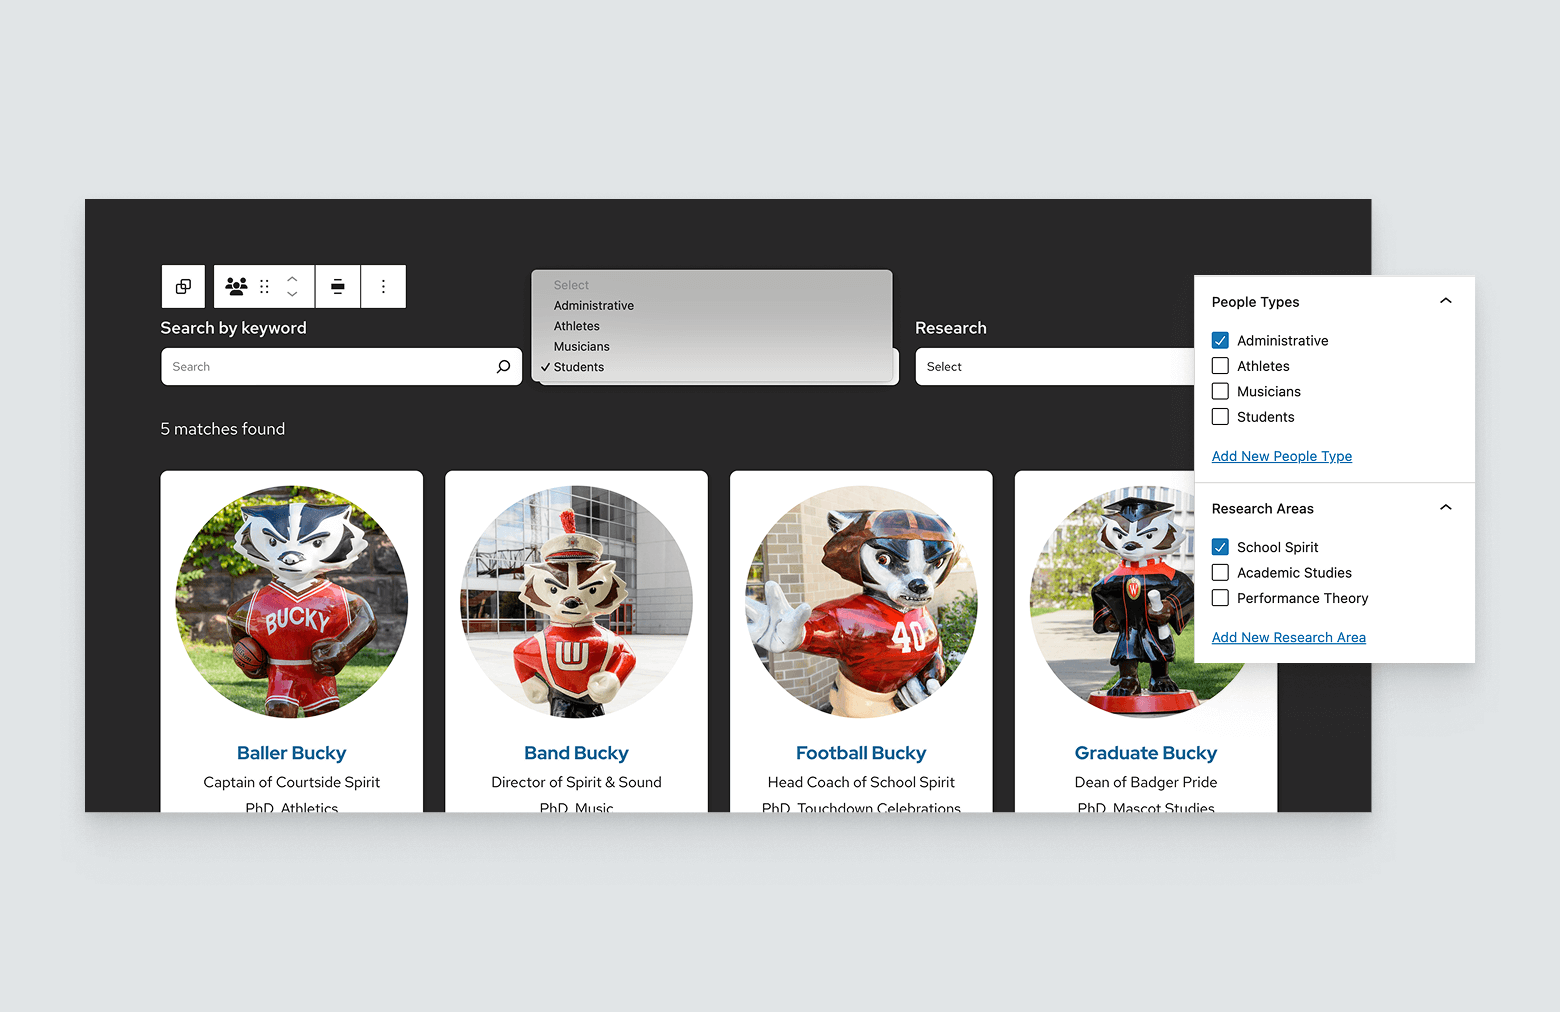
Tags help you group people and make them easier to find. By default, the plugin includes People Types (e.g., Faculty, Staff, Student) and Research Areas (e.g., Biochemistry, Educational Psychology, Neuroscience).
In the People Listing block, these tags become filter options for visitors.
Tip: You can rename “People Types” and “Research Areas” in the People Listing block search filter to match your needs (e.g., Roles and Programs).
Add tags to organize people
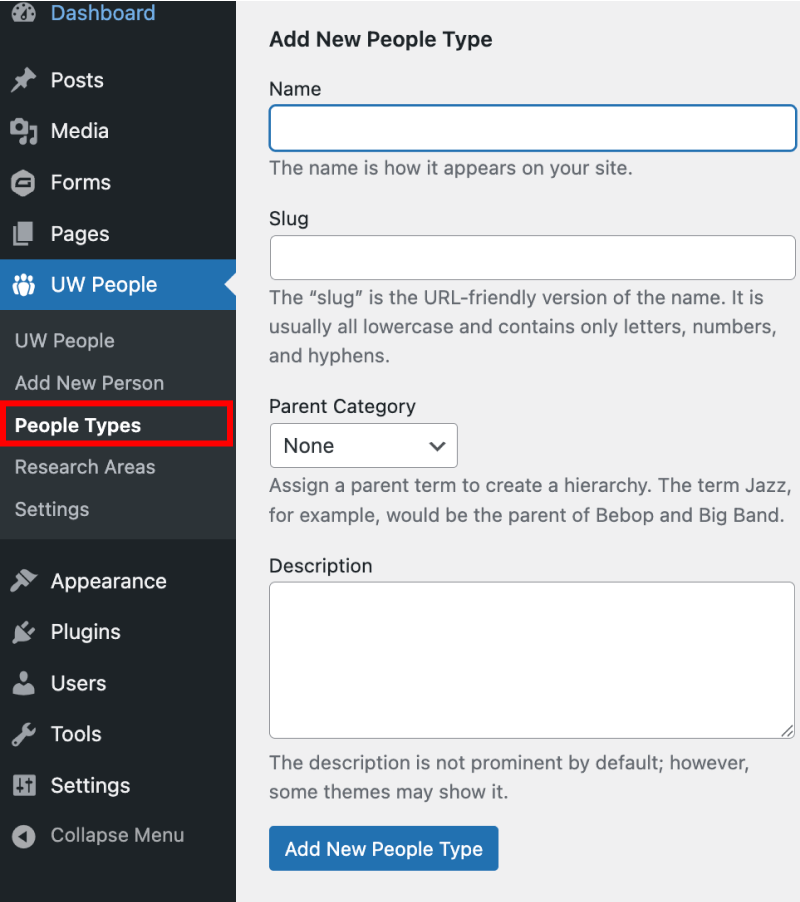
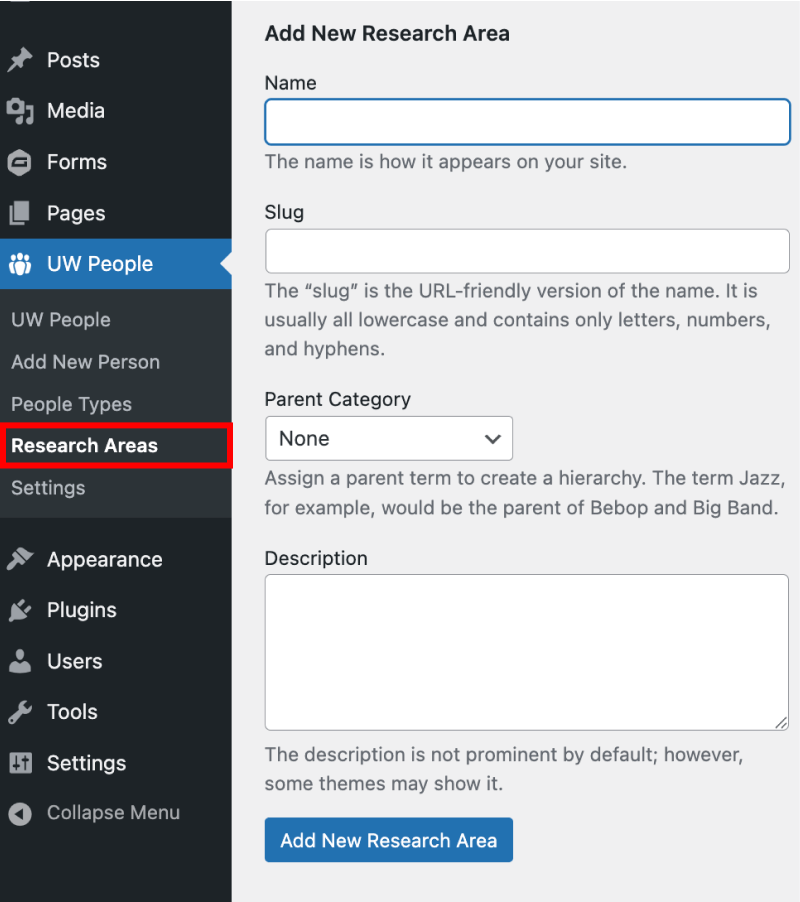
Go to WordPress Admin > UW People > People Types or UW People > Research Areas to create tags for each category.
Change URL structure
By default, people pages use /staff/ in the URL. For example:
https://examplesite.wisc.edu/staff/person-name
You can change /staff/ to another term in WordPress Admin > UW People > Settings.
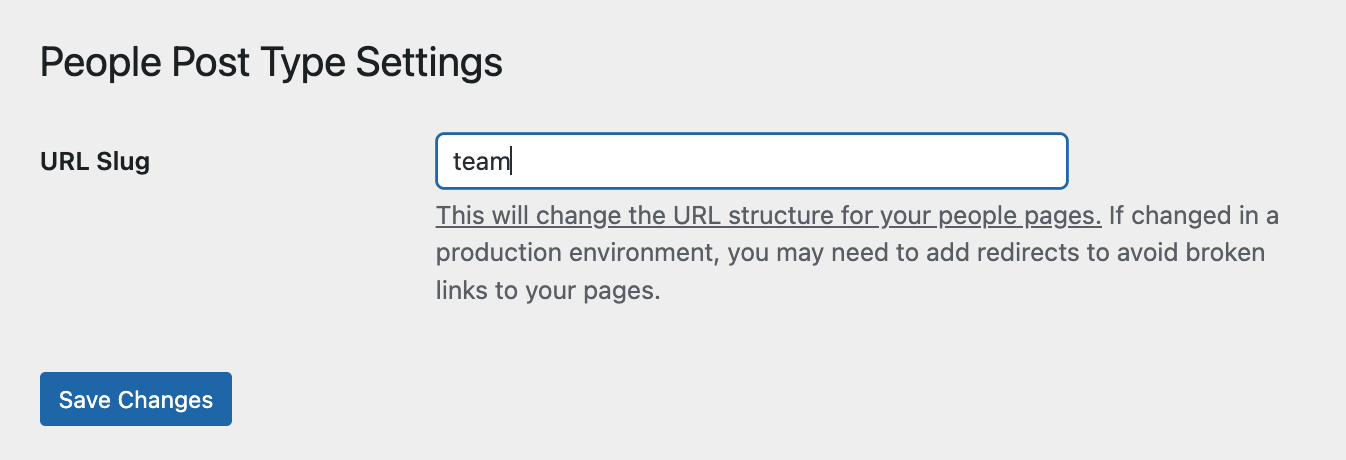
Note: If you change this after creating people pages, you may need to set up redirects to avoid broken links. If your site is hosted in WiscWeb, you can use the Redirection plugin.
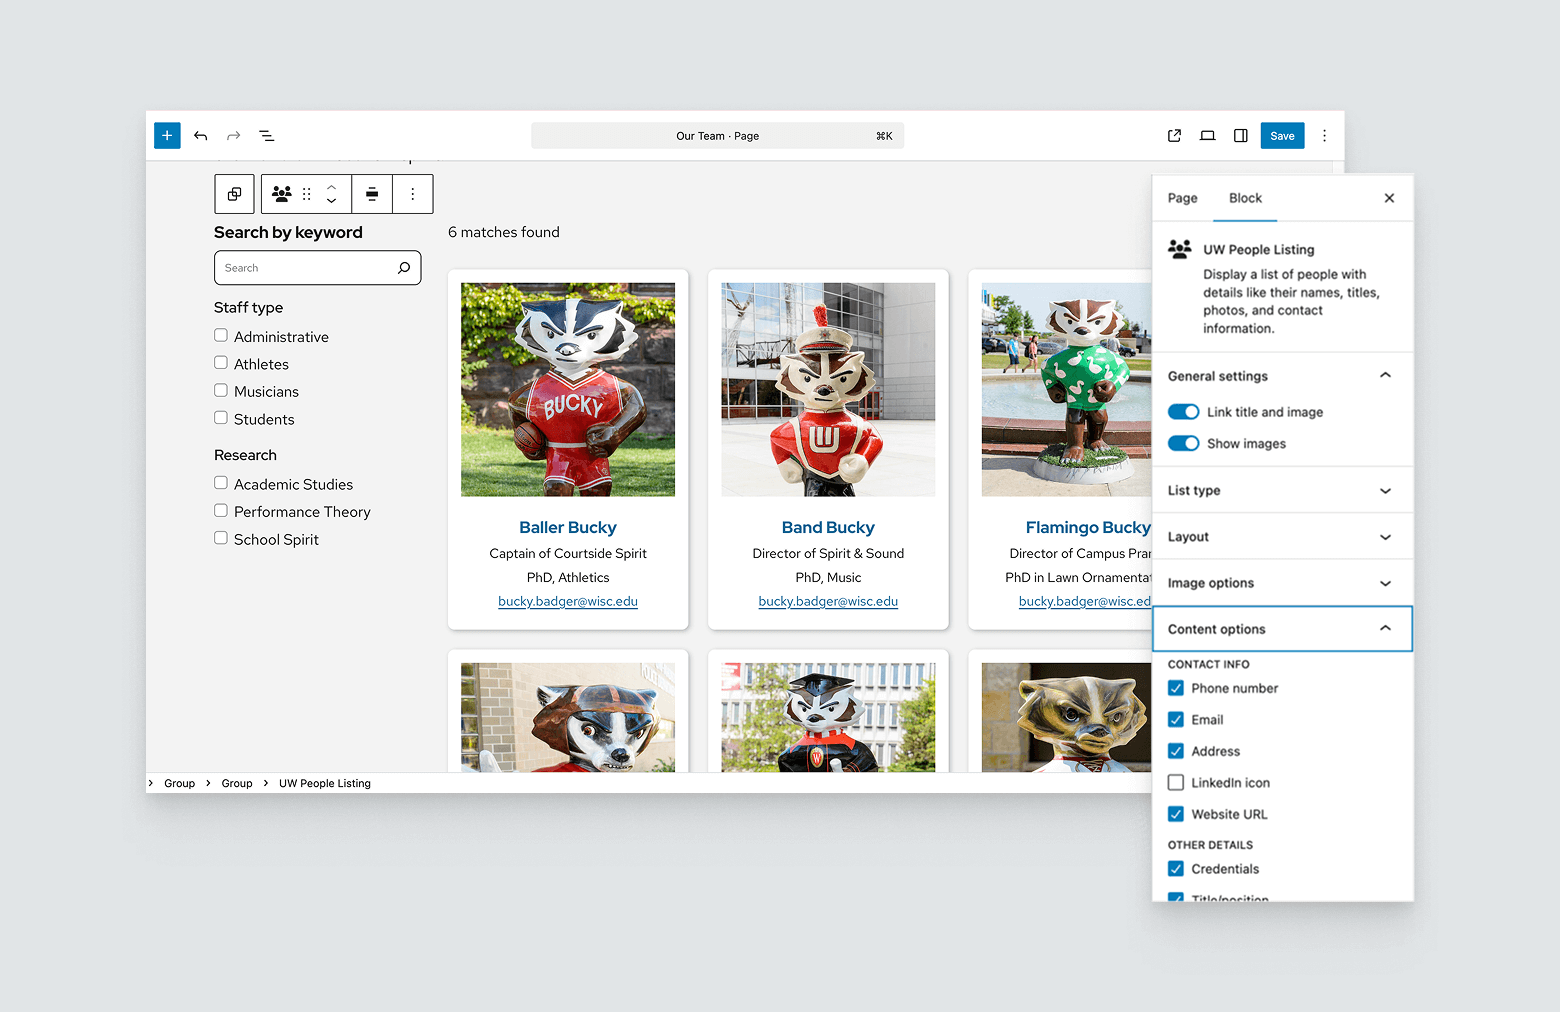
Display people on your site
After you’ve created individual people pages, you can showcase them anywhere on your site with the UW People Listing block. Add the block to a page to build directories, team grids, or staff lists. Choose from different layouts (grid, list, or cards) and optionally turn on search and filters so visitors can browse by type or research area.
Recommendations

When to use
- You want to create individual profile pages for faculty, staff, students, or other types of people for your group.
- You need a directory or team listing that can be reused across multiple pages.
- You want visitors to filter/search by role, research area, or other categories.

When to consider something else
- You only need a static team page with a few names and photos — use patterns or create your own layout with blocks (Columns, Image, Paragraph).
- You don’t need structured data or filtering, just a quick bio on a single page — add content directly with basic blocks or a Card pattern.
Usability and accessibility
People details
- Profile images of people should have alt text. Learn how to describe people with alt text.
- Keep excerpts for people short (200 characters or less).
- Make sure any additional content added below the person details have the correct heading levels (H2, H3, H4, etc.).
- Encourage users to keep names, titles, and excerpts concise so listings stay scannable.
Tags
- Limit the number of tags; too many can make filters harder to use.
- Keep tag names short and clear (1–2 words).
- Use consistent wording (e.g., choose either Biology or Biological Sciences, not both).
- Plan tags in advance so your lists stay clean and meaningful.