Building a post list archive with images
Last updated:
This guide walks through how to create a new page that includes a post listing with images. The page can be used in place of the default category archive pages that get created by WordPress.
Redirection plugin required
The steps outlined in this guide requires the use of the WordPress Redirection plugin. If your UW Theme 2.0 site is hosted in the WiscWeb WordPress Service, the Redirection plugin is already available for you to activate and use.
About archive pages
A WordPress archive page is an automatically generated webpage that lists related posts based on certain criteria. Instead of a single article, it displays a collection of posts that share a specific taxonomy. There are four main types of archives:
- Category archives: Displays every post filed under a specific category
- Example: yoursite.wisc.edu/category/research
- Tag archives: Gathers posts tagged with a specific keyword
- Example: yoursite.wisc.edu/tag/awards
- Author archives: Lists all articles written by a specific user
- Example: yoursite.wisc.edu/author/bucky
- Date archives: Groups posts by the month or year they were published
- Example: yoursite.wisc.edu/2026/09
Some people want to customize the design of these pages. While some “block themes” allow you to edit archive templates visually, UW Theme 2.0 is a hybrid theme and does not allow template editing in order to maintain global brand and accessibility standards across campus.
Redirecting an archive page to a custom static page is the best workaround for changing its design.
Step 1: Create a new page
Create a new page that you will use as your post listing archive for your category.
Step 2: Add the “Post listing with image” pattern
- Click on the Block Inserter (+) button in the top left corner of your editing screen

- Click on the Patterns tab

- Select the Post Listing pattern category

- Scroll down and click on the post listing pattern with images to the left titled “Post listing with image.”
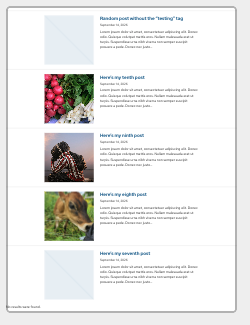
Your images may appear different
The posts and images that appear for you in the display will differ from the image below. Each post must include a Featured Image in order to appear in the post listing.
Visit the WordPress Page/Post Settings sidebar guide for how to set and update a featured image for posts.
Step 3: Add pagination to the post listing
- Open the Document Overview/List View by click on the Block Insert (+) button in the top left.
- Select the More options menu (three-vertical) for the No Results block, and then select Add before from the fly-out menu.
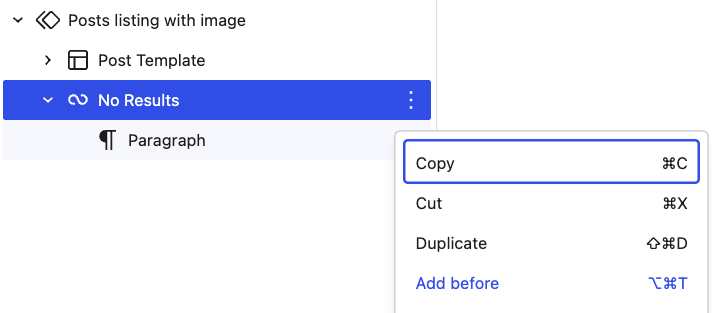
- In the editor, type
/paginationto add the WordPress Pagination block to the page
Step 4: Filter the list based on your category
- Open the Document Overview/List View
- Click on the Patterns tab
- Select the “Post listing with image” query loop block
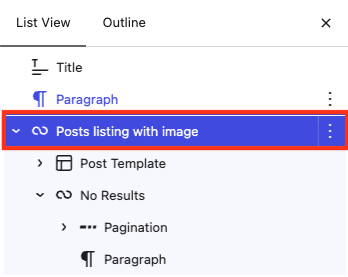
- Open the righthand Settings sidebar
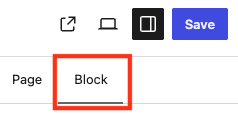
- Make sure the Block tab is selected
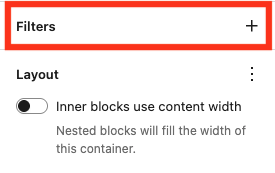
- Scroll down and click on the plus sign (+) next to the Filters title to open it
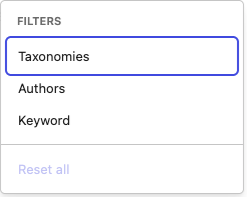
- Choose Taxonomies from the fly-out menu
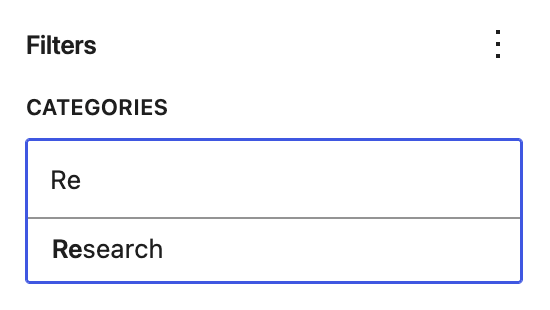
- Type in the category name that you want to filter your list by
- Visit the WordPress Query Loop documentation to learn more about using this block.
- Save the page
Step 5: Redirect the old archive page to the new one
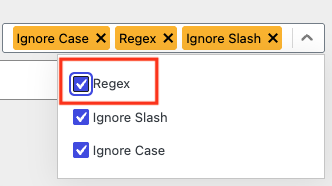
Regex setting required in the Redirection plugin
In order for this redirect to work, the Regex setting must be enabled in the Redirection plugin. The steps below walk through how to enable this setting and redirect the page.
- Activate the Redirection plugin in your site, if it’s not already active.
- If your UW Theme 2.0 site is hosted in WiscWeb, learn how to activate and setup the Redirection plugin.
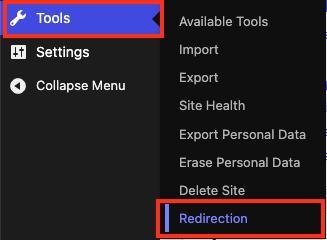
- After the plugin is activated, navigate to Tools > Redirection in the left menu of your dashboard.
- Under “Add new redirection”, add the source URL you’ll be redirecting from:
- Type an upwards carrot icon (^)
- Type /category
- Type another slash (/) and then type in the name of the post category you are using (e.g., /categoryname)

- In the Target URL field, add the full URL for the new block archive page you’re redirecting it to:

- In the dropdown of settings on the right of the Source URL field, enable the Regex option:
- Save the redirect
- Visit the old archive page URL to test that the redirect is successful
Get more help
WiscWeb sites
If your UW Theme 2.0 site is hosted in the WiscWeb WordPress Service, contact their support team for help.
Non-WiscWeb sites
If you manage or develop a custom
UW Theme 2.0 site outside of WiscWeb, email the UW Theme team.
Weekly Office Hours
Get one-on-one help with design, accessibility, and WordPress in weekly office hours.
Not sure who to contact? Email the UW Theme Team or find additional resources.